编者按: 多点触控乃苹果公司带给世界的创新之首,作为移动开发者,熟练掌握多点触控开发技能很有必要。
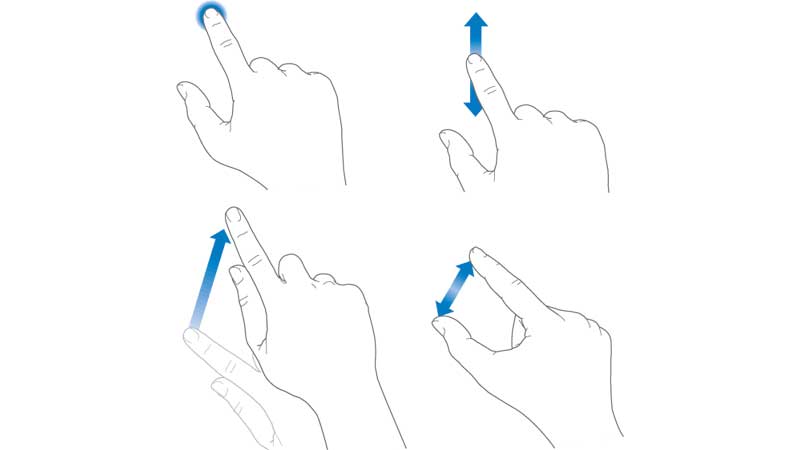
一、处理触摸的四个方法:
-(void)touchesBegan:(NSSet *)touches withEvent:(UIEvent *)event
{
NSLog(@"touchesBegan");
}
-(void)touchesMoved:(NSSet *)touches withEvent:(UIEvent *)event
{
NSLog(@"touchesMoved");
}
-(void)touchesEnded:(NSSet *)touches withEvent:(UIEvent *)event
{
NSLog(@"touchesEnded");
}
-(void)touchesCancelled:(NSSet *)touches withEvent:(UIEvent *)event
{
NSLog(@"touchesCancelled");
}
|
快速点击屏幕,Debug窗口显示
2014-01-13 22:47:10.121 bbsTouch[593:70b] touchesBegan

2014-01-13 22:47:10.125 bbsTouch[593:70b] touchesEnded

2014-01-13 22:47:10.238 bbsTouch[593:70b] touchesBegan

2014-01-13 22:47:10.239 bbsTouch[593:70b] touchesEnded

2014-01-13 22:47:10.242 bbsTouch[593:70b] touchesBegan

2014-01-13 22:47:10.244 bbsTouch[593:70b] touchesEnded
|
点击并在屏幕上拖动,Debug窗口显示
2014-01-13 22:48:44.148 bbsTouch[593:70b] touchesBegan

2014-01-13 22:48:44.163 bbsTouch[593:70b] touchesMoved

2014-01-13 22:48:44.195 bbsTouch[593:70b] touchesMoved

2014-01-13 22:48:44.211 bbsTouch[593:70b] touchesMoved

2014-01-13 22:48:44.229 bbsTouch[593:70b] touchesMoved

2014-01-13 22:48:44.249 bbsTouch[593:70b] touchesMoved

2014-01-13 22:48:44.281 bbsTouch[593:70b] touchesMoved

2014-01-13 22:48:44.314 bbsTouch[593:70b] touchesMoved

2014-01-13 22:48:44.330 bbsTouch[593:70b] touchesMoved

2014-01-13 22:48:44.347 bbsTouch[593:70b] touchesMoved

2014-01-13 22:48:44.821 bbsTouch[593:70b] touchesEnded
|
touchesMoved可能不会在触摸队列中产生,然而,touchesBegan事件之后,总会产生touchesEnded或touchesCancelled事件。
二、开启多点触控的方法:
若在真机设备构建和运行应用程序,就会发现虽然在屏幕上按下了两根手指,但第二个触点却被忽略了。这是因为,默认情况下View是忽略多触点的,必须专门为需要支持多触点的View开启此功能。若要开启多触点,需要编写代码修改根视图的multipleToucheEnabled属性。
self.view.multipleTouchEnabled = TRUE;
|
在触摸的生命周期里,每个UITouch对象都为同一个实例化对象,也就是说屏幕每个独立触摸全程都表示各为同一UITouch对象。在触摸方法添加代码如下。
-(void)touchesBegan:(NSSet *)touches withEvent:(UIEvent *)event
{
NSLog(@"touchesBegan");
for (UITouch *touch in touches)
{
NSLog(@" - %p",touch);
}
}
-(void)touchesMoved:(NSSet *)touches withEvent:(UIEvent *)event
{
NSLog(@"touchesMoved");
for (UITouch *touch in touches)
{
NSLog(@" - %p",touch);
}
}
-(void)touchesEnded:(NSSet *)touches withEvent:(UIEvent *)event
{
NSLog(@"touchesEnded");
for (UITouch *touch in touches)
{
NSLog(@" - %p",touch);
}
}
-(void)touchesCancelled:(NSSet *)touches withEvent:(UIEvent *)event
{
NSLog(@"touchesCancelled");
for (UITouch *touch in touches)
{
NSLog(@" - %p",touch);
}
}
|
增加一段代码作用是打印出包含在集合中每个UITouch对象的内存地址。下面为设备屏幕按下两根手指的输出结果
2014-01-14 23:52:56.590 bbsTouch[3671:907] touchesBegan

2014-01-14 23:52:56.606 bbsTouch[3671:907]  - 0x1ddaac00

2014-01-14 23:52:56.623 bbsTouch[3671:907] touchesBegan

2014-01-14 23:52:56.628 bbsTouch[3671:907]  - 0x1dd9b690

2014-01-14 23:52:56.633 bbsTouch[3671:907] touchesMoved

2014-01-14 23:52:56.637 bbsTouch[3671:907]  - 0x1ddaac00

2014-01-14 23:52:56.895 bbsTouch[3671:907] touchesMoved

2014-01-14 23:52:56.902 bbsTouch[3671:907]  - 0x1dd9b690

2014-01-14 23:52:56.904 bbsTouch[3671:907]  - 0x1ddaac00

2014-01-14 23:52:56.958 bbsTouch[3671:907] touchesEnded

2014-01-14 23:52:56.963 bbsTouch[3671:907]  - 0x1dd9b690

2014-01-14 23:52:56.967 bbsTouch[3671:907]  - 0x1ddaac00
|
两根手指先后触摸屏幕,进入touchesBegan,内存分为0x1ddaac00,0x1dd9b690触摸过程完成后,内存地址也能被系统回收。
三、调用UITouch对象方法——locationInView,多点移动多个对象
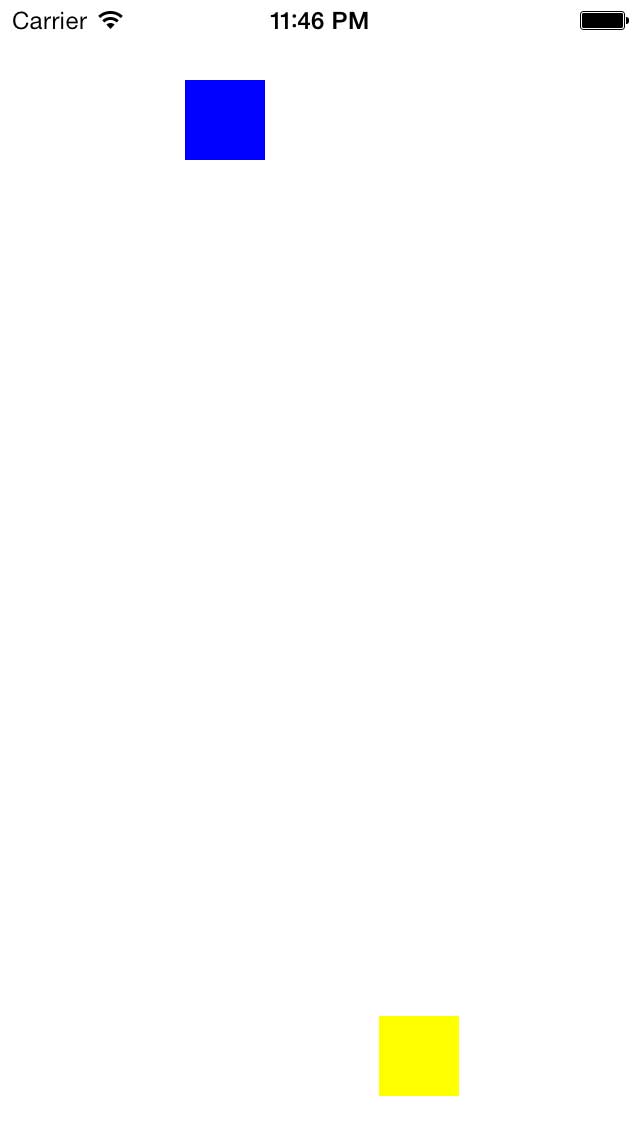
屏幕上新建两个view,实现两个手指在屏幕上移动两个view,通过规则约束两个view的活动范围。
关键在于调用UITouch对象的方法——lacationInView。此方法返回View的相对于根视图的触摸位置。返回值是一个CGPoint类型,是一个包含X坐标和Y坐标的结构体。我让两个view在屏幕上下两个半区水平移动。利用CGPointMake来快速初始化新的CGPoint结构体。
- (void)viewDidLoad
{
[super viewDidLoad];
self.view.multipleTouchEnabled = TRUE;
_view1 = [[UIView alloc] initWithFrame:CGRectMake(0, 40, 40, 40)];
_view1.backgroundColor = [UIColor blueColor];
[self.view addSubview:_view1];
_view2 = [[UIView alloc] initWithFrame:CGRectMake(0, self.view.frame.size.height - 60, 40, 40)];
_view2.backgroundColor = [UIColor yellowColor];
[self.view addSubview:_view2];
}
-(void)touchesBegan:(NSSet *)touches withEvent:(UIEvent *)event
{
NSLog(@"touchesBegan");
for (UITouch *touch in touches)
{
CGPoint touchPoint = [touch locationInView:self.view];
if (touchPoint.y < self.view.frame.size.height/2)
{
_view1.center = CGPointMake(touchPoint.x, _view1.center.y);
}else
{
_view2.center = CGPointMake(touchPoint.x, _view2.center.y);
}
}
}
-(void)touchesMoved:(NSSet *)touches withEvent:(UIEvent *)event
{
NSLog(@"touchesMoved");
for (UITouch *touch in touches)
{
[self touchesBegan:touches withEvent:event];
}
}
-(void)touchesEnded:(NSSet *)touches withEvent:(UIEvent *)event
{
NSLog(@"touchesEnded");
for (UITouch *touch in touches)
{
NSLog(@" - %p",touch);
}
}
-(void)touchesCancelled:(NSSet *)touches withEvent:(UIEvent *)event
{
NSLog(@"touchesCancelled");
for (UITouch *touch in touches)
{
NSLog(@" - %p",touch);
}
}
|
下图为两个view可以分别沿着水平方向移动
四、可靠的多点触控,为每个View分配唯一触摸对象
每个View需要分配有效的触摸以避免第三方触摸的干扰。实现方法如下
.h文件,接口定义两个变量
#import <UIKit/UIKit.h>

@interface BBSViewController : UIViewController
{
    UITouch *touch1;
    UITouch *touch2;
}
|
.m文件,在touchesBegan里为view分配一个特定触摸对象(仅当它还未分配时)。
-(void)touchesBegan:(NSSet *)touches withEvent:(UIEvent *)event
{
NSLog(@"touchesBegan");
for (UITouch *touch in touches)
{
CGPoint touchPoint = [touch locationInView:self.view];
if (touch1 == nil && touchPoint.y < self.view.frame.size.height/2)
{
touch1 = touch;
_view1.center = CGPointMake(touchPoint.x, _view1.center.y);
}else if (touch2 == nil && touchPoint.y > self.view.frame.size.height/2)
{
touch2 = touch;
_view2.center = CGPointMake(touchPoint.x, _view2.center.y);
}
}
}
|
在touchesMoved方法里,忽略所有未绑定View的触摸
-(void)touchesMoved:(NSSet *)touches withEvent:(UIEvent *)event
{
NSLog(@"touchesMoved");
for (UITouch *touch in touches)
{
CGPoint touchPoint = [touch locationInView:self.view];
if (touch == touch1)
{
_view1.center = CGPointMake(touchPoint.x, _view1.center.y);
}
else if (touch == touch2)
{
_view2.center = CGPointMake(touchPoint.x, _view2.center.y);
}
}
}
|
及时释放已绑定了View的触摸,避免手指一离开屏幕就永久失去对View的控制。
-(void)touchesEnded:(NSSet *)touches withEvent:(UIEvent *)event
{
NSLog(@"touchesEnded");
for (UITouch *touchin touches)
{
NSLog(@" - %p",touch);
if (touch == touch1)touch1 = nil;
else if (touch ==touch2) touch2 = nil;
}
}
-(void)touchesCancelled:(NSSet *)touches withEvent:(UIEvent *)event
{
NSLog(@"touchesCancelled");
[self touchesEnded:touches withEvent:event];
}
|
这样多余的触摸将不会影响现有的View的位置。
鼓励一下
如果觉得我的文章对您有用,欢迎打赏(右边栏二维码),您的支持将鼓励我继续创作!”
咨询联系方式
请发邮件:
admin@kovli.com
版权声明:
转载时请注明作者Kovli以及本文地址:
http://www.kovli.com/2014/01/13/ios-touch/